

How To Change Bolts On Aescape Flex Pipe Youtube
Installing a Bushing Without a Printing
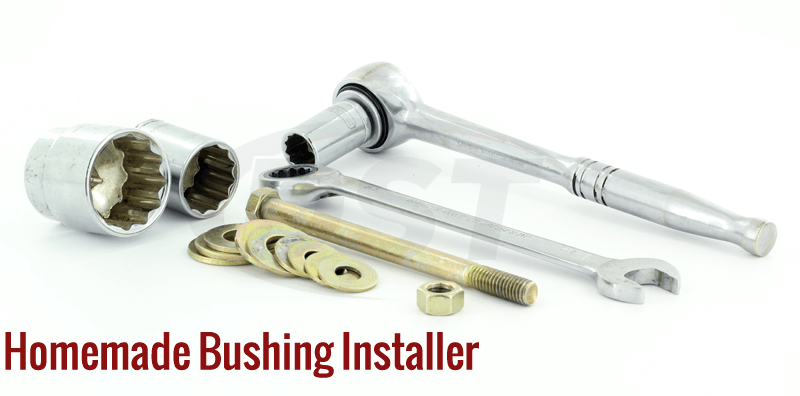
If you don't have access to a hydraulic press, every bit very few of us do, there is a elementary and inexpensive culling to installing a suspension bushing. Using tools we had laying effectually, and a trip to the hardware store, we built a bootleg bushing installer that did the job chop-chop and efficiently. More than importantly, the hardware cost was under $10. In this article, we'll show you lot how to make your own bushing installer and give yous some dos and don'ts to make your install go equally smoothly as possible.
- Removing the OE Bushing
- Bushing Installer Parts: Do'southward and Don'ts
- Tips and Tricks for a Smooth Installation
- Installing the Bushing
For those of you visual learners.
Removing the OE Bushing
Earlier you can install your new bushing, you have to remove the old ane. If you need help removing your OE bushing, check out our How-To Burn Out Bushings: The Right Fashion article.
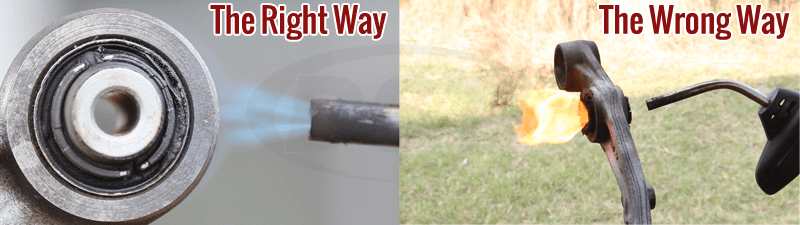
**Be sure to consult your installation instructions before you remove the outer crush, as a lot of aftermarket bushings require the apply of the OE crush.** But for those of you with bushings that accept a new outer trounce, please read below to see how we installed a bushing without a hydraulic press.
Sand and Polish the Housing
Once you lot take removed the OE bushing and vanquish, yous should be left with an empty housing. Its a practiced idea to sand and polish the inner bore of the housing before you lot install anything in order to clean upward any corrosion, contaminants or rust that may take accumulated. The terminal affair you want is a sharp edge in there that damages your new bushing when you lot install it. Additionally, a clean and polished housing will reduce friction, allowing the new bushing to be installed more than easily.
Bushing Installer Parts: Practise's and Don'ts
Once your housing is prepped, yous are ready to build your bushing installer. Full disclosure: The kickoff bushing installer we built failed, hard. It but wasn't stiff enough to provide the force necessary to install the bushing. So throughout the description of this installer, when we say "you don't desire to use" something, information technology's considering we tried information technology and it failed.
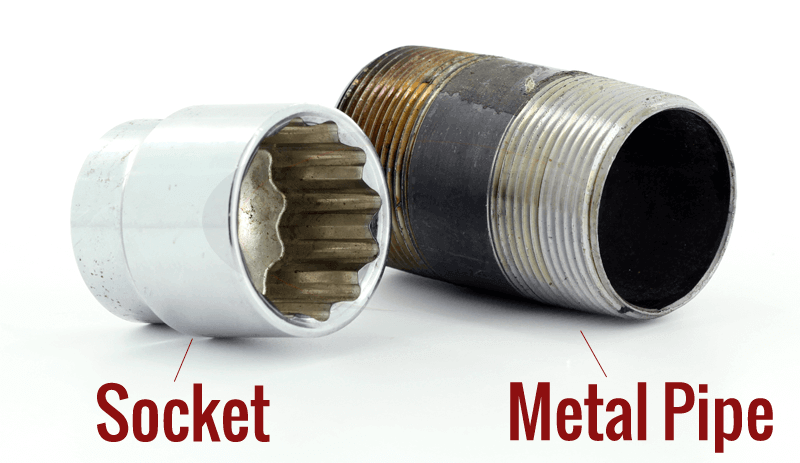
Sockets or Pipe
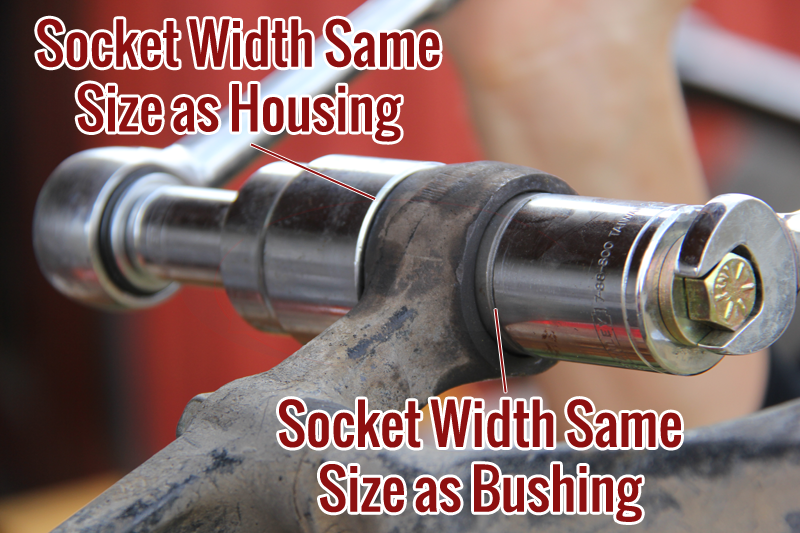
We used a set up of sockets because we had a ready available, so if yous have a socket set yous can use that. But if you lot don't have one, and you don't want to go spend a hundred dollars on a overnice ready of sockets, don't worry. Y'all can do the same affair with two pieces of 3 dollar metal pipage. Y'all will demand a slice of pipage with the same diameter as the bushings, and the second slice of pipe with a larger diameter that volition brace itself against the housing you're installing the bushings into.
Important Notes about Nuts and Bolts
Now that you have your sockets or pipes, you need a threaded bolt to go through the unabridged contraption. A few of import things about the nuts and bolts:
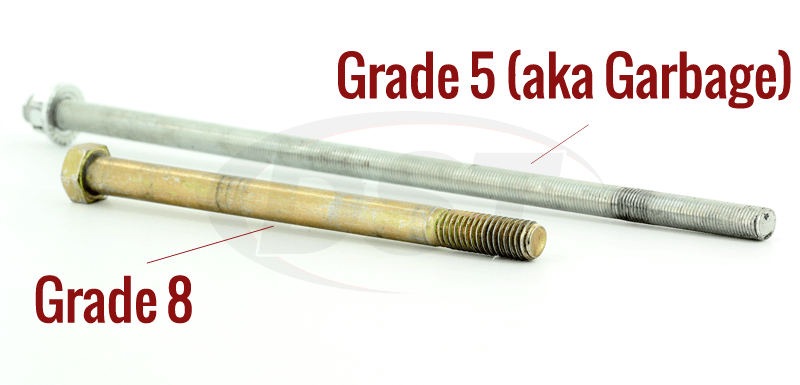
Use a Grade 8 bolt, not a Course 5
A Grade viii commodities tin can be identified very easily. On the head of the bolt, you'll see a number of lines. If in that location are 6 lines on the head, that's a Grade 8, if in that location are iii lines, that's a Grade v.

The outset bushing installer we built used a Grade 5 All Thread rod. The threads on the Grade 5 were as well soft and failed nether pressure when we were installing the bushing into the housing. When we switched to a Grade 8 bolt, nosotros wondered why we ever tried anything else.
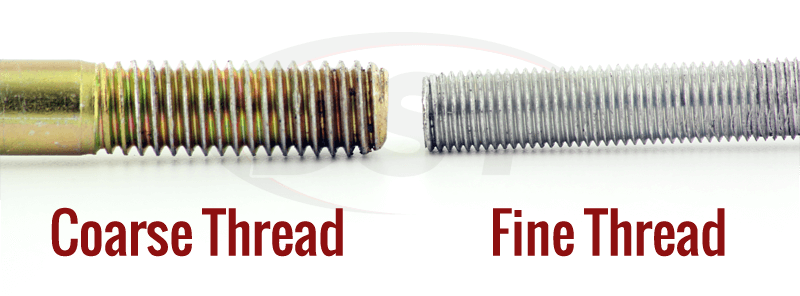
Use a Coarse thread, not a Fine thread
With our brilliant minds (sarcasm) nosotros thought surely to use a fine threaded rod. The more than threads there are the less forcefulness needed to complete a turn on a thread. Thus reducing the corporeality of strength required to button the bushing in. That was the thought anyhow. But in practice, the fine threads were weaker and failed nether the stress. A coarse thread is stronger and more durable for a task that requires as much force as installing a bushing.
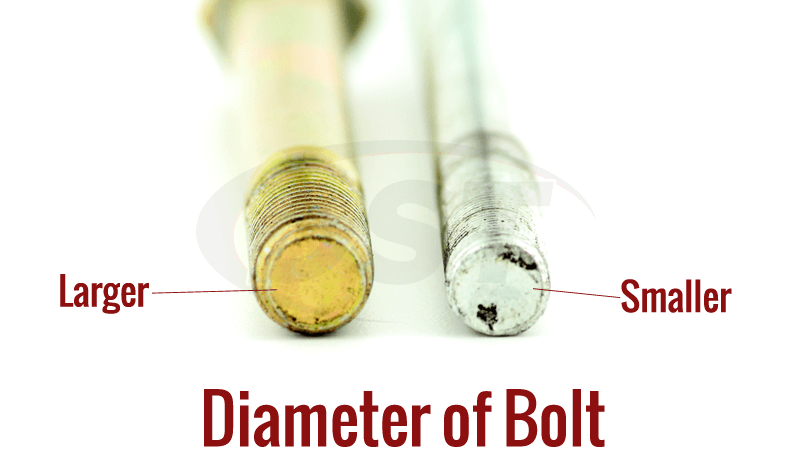
Employ the largest diameter commodities allowed
This bolt will have a lot of stress on it to install the bushing, so you lot'll need a bulky bolt. But this bolt will have to fit through the inner sleeve of your bushing. Be sure to become the largest diameter bolt as allowed by your inner sleeve size.
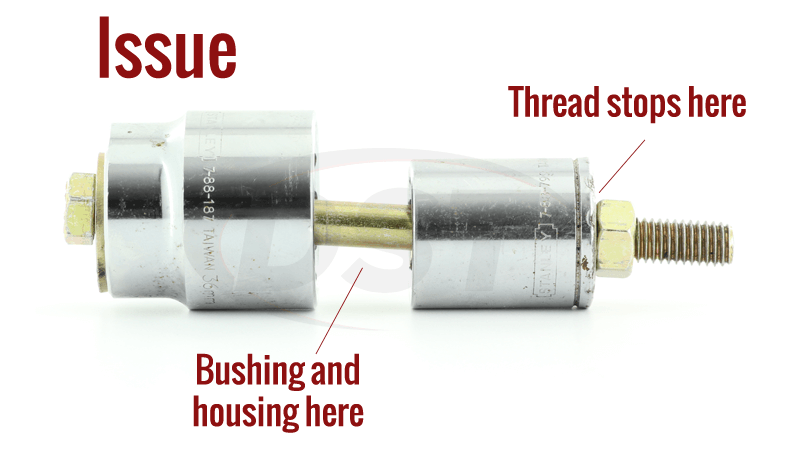
Long Course 8 Bolts usually have picayune threading
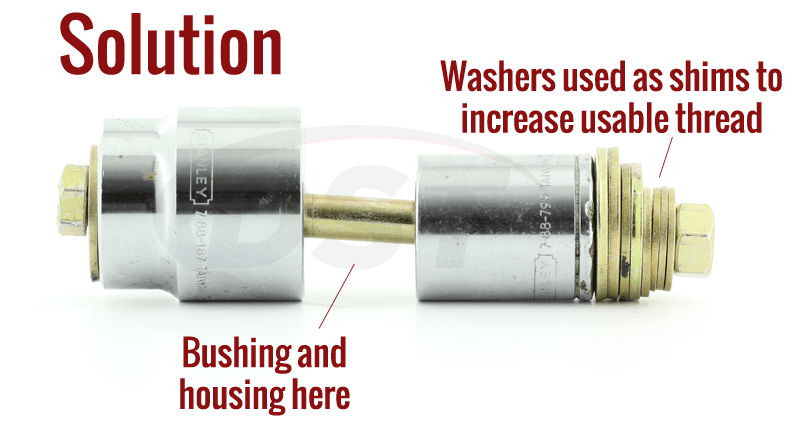
Now this is where we had to stop and put our thinking caps on. The whole point of the bushing installer was to tighten ii nuts, causing the sockets to push against the bushing on one side, and the housing on the other, pushing the bushing into the housing. Then we needed a threaded bolt that would let us to torque the bushing all the way in. This is why we originally used the all thread rod, lots of threads. Just once that failed, we tried to find a Grade 8 commodities that would work. Unfortunately, the Grade eight bolts at our local hardware store had a short thread length. In one case we threaded the nut downwards to where it touched the socket, we had maybe one or two turns of thread left. Afterwards we pouted for a minute a light-bulb came on. Washers! Using a stack of washers as shims nosotros were able to use the unabridged thread and then some. Once we torqued the nut to the terminate of the thread, we took the nut off and added more washers to reset the bolt to the end of the thread.
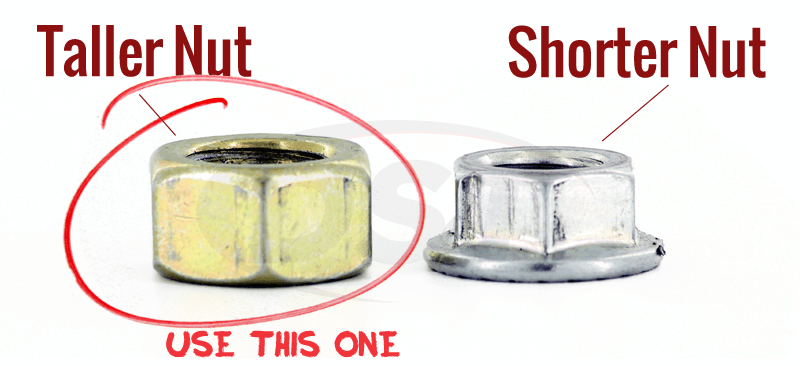
Use a tall nut
The taller the nut, the more than threads the nut has. Our first nut was short. When we switched to Grade viii, nosotros had to switch basics as well. The taller nut had way more threads, allowing the force to spread on a larger portion of the bolt, putting less stress on each individual thread. Now all y'all need is two wrenches (or one wrench and pair of vice grips) and you take your home-made bushing installer.
Tips and Tricks before y'all Install
Before y'all first torquing at that place are a few other tips and tricks you can use to make your install smoother.
Lubricate the commodities
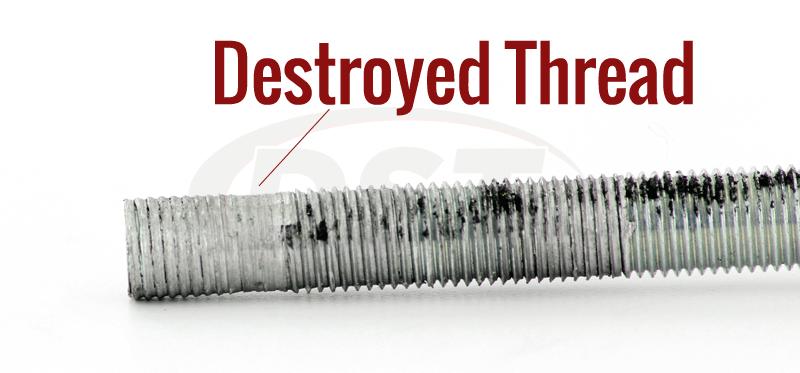
This was a critical step in our success. The showtime go effectually we didn't lubricate the commodities. The nut got really hot (to the touch) because of all the friction. That heat softened the metal, making the rod not only likewise weak to install the bushing, but nosotros actually destroyed the thread. On the grade eight bolt, we lubricated the thread. It reduced friction, which reduced the heat, allowing the metal to stay stiff.
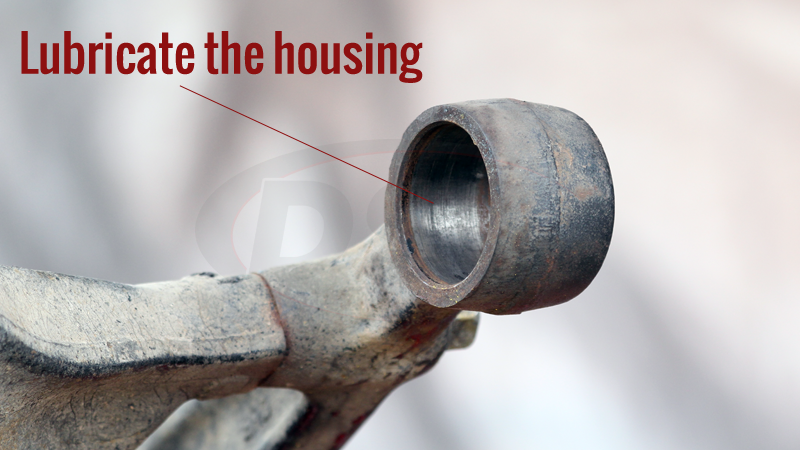
Lubricate the housing with oil
Nosotros too lubricated the housing with oil. The oil helped the bushing slide in by reducing friction. Additionally, a coat of oil will protect your freshly polished metal from corrosion.
Freeze the bushing
Huh? Yeah, you read that right. Science backs it upward. Metal contracts in the common cold. We put the bushing in the freezer for 24 hours before the install to aid contract the bushing. Now it didn't make the bushing only drop in, but even the slightest decrease in the bushing diameter tin can make all the difference.

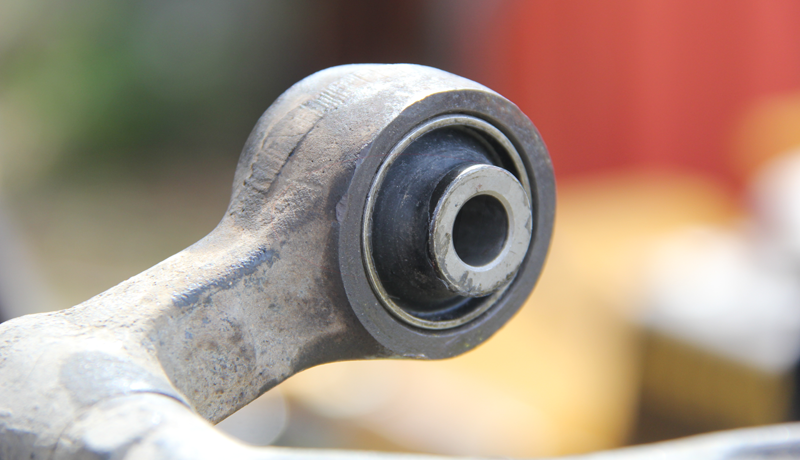
Installing the Bushing
At present you are ready to install. Use a wrench or vice grips to hold one of the nuts tight. Then torque the other nut with a wrench. As the socket pushes the bushing, the contrary socket acts as a brace, pressing up against the housing substantially pressing the bushing into the housing. After a few minutes, the bushing was entirely in the housing, all without a press.

Once nosotros had the right tools, the process was very unproblematic. We even used the same tool to remove the bushing and so put it BACK in. It's really all about having the right tools. And so if you are having trouble installing your bushing with your bootleg bushing installer, call up:
- Find the Right Size Sockets or Pipes
- Utilize a Course 8 Bolt
- Coarse threads, not Fine threads
- Use the largest diameter bolt possible
- Use washers as shims to reset thread
- Alpine nut beats short nut everyday
Making certain yous have the proper tools for the job is key to your success. But don't forget these helpful tips and tricks:
- Lubricate the Bolt Thread
- Lubricate the Housing
- Freeze the Bushing
If you have whatever other questions annotate below or contact our DST customer service team. Share you successes and failures (if you dare) in the comments beneath? Was anybody surprised nigh the freezing the bushing tip?
Source: https://www.suspension.com/blog/how-to-install-a-bushing-without-a-press/
Posted by: stoneboad1945.blogspot.com
0 Response to "How To Change Bolts On Aescape Flex Pipe Youtube"
Post a Comment