

How To Draw A Cross With A Heart
A cantankerous is a geometrical figure consisting of an intersecting curt horizontal line and a long vertical line.
This shape is especially known for signifying Christianity, representing the Crucifixion of Jesus Christ on the cross besides the redeeming benefits of his Passion and death.
Thus, the cross has since been a chief symbol of Christ and the Christian faith.
While cartoon a cross may seem pretty like shooting fish in a barrel, it really requires immense focus and concentration to draw information technology proportionally.
And since the effigy of the cantankerous mainly consists of multiple straight lines, don't forget to grab a ruler to help yous depict a cross perfectly!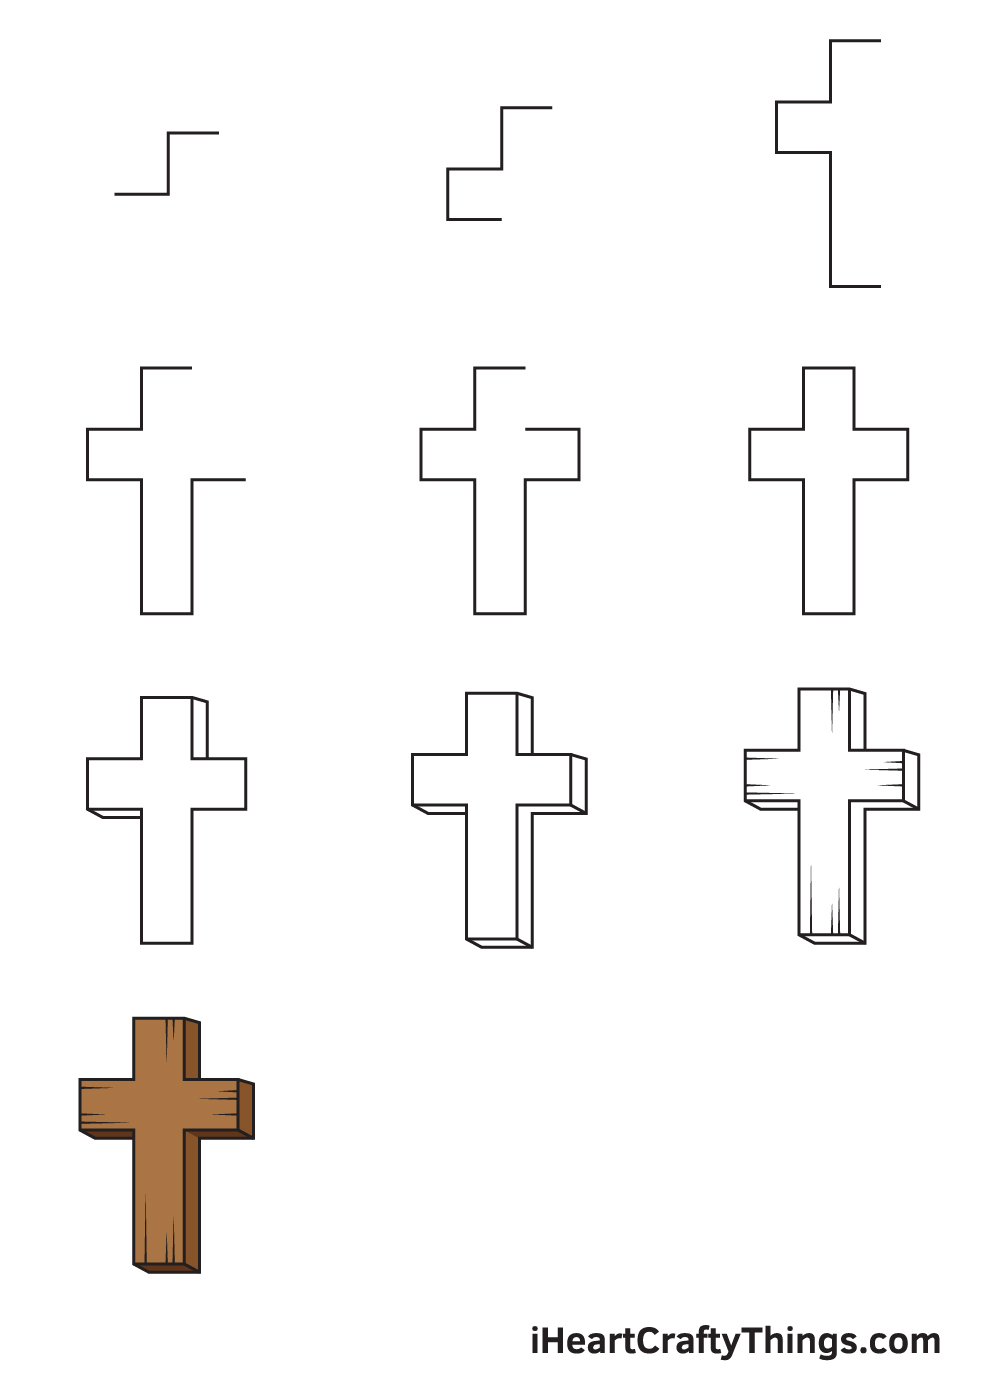
To make it easier for you, we have curated a step-by-step tutorial on how to describe a cross, summed upward in 9 like shooting fish in a barrel and unproblematic steps.
With this comprehensive guide, drawing a cross is made less complicated and much more fun!
Each stride in this drawing tutorial is accompanied with elaborate illustrations, helping you amend understand the process.
Have fun drawing a symmetrical cross figure!
What's in this Web log Postal service
- How to Draw a Cantankerous — Let's become started!
- Stride 1
- Step two — Draw the Head and the Left Crossbar
- Step iii — Complete the Left Side of the Cross
- Pace 4 — Draw the Lower Right Part of the Cantankerous
- Step v — Finish Cartoon the Right Batten
- Step 6 — Finalize the Shape of the Cantankerous
- Step 7 — Add together a Width Illusion on the Cross
- Stride eight — Create a 3-Dimensional Result
- Step 9 — Add Patterns and Texture on the Surface
- Your Cross Drawing is Complete!
How to Draw a Cross — Permit'due south become started!
Step ane
Starting in the upper heart portion of your paper, draw a horizontal line to outline the peak of the cantankerous. And then, starting from the left cease of the horizontal line, draw a vertical line.
Afterwards, draw some other horizontal line from the lesser end of the vertical line going to the left. Go along in listen that all three connected lines should have the same length.
When drawn correctly, information technology should wait like a stair with two steps, as shown in the analogy. Feel free to use a ruler to assist you draw straight lines rapidly and effortlessly.
This will help ensure that all the lines forming the cross are drawn evenly and proportionally.
In order to make certain that the cross volition be drawn in the middle of your paper, describe a horizontal line and a vertical line across your paper. Apply information technology as reference lines to assistance you determine the perfect spot to describe the lines on.
Step 2 — Depict the Head and the Left Batten
Starting from the left terminate indicate of the final horizontal line we drew in the previous step, draw a downwards vertical line with the aforementioned length. Then, from the bottom end indicate of the vertical line we only drew, describe a horizontal line going to the right.
This horizontal line should be aligned with the one right above information technology, as shown in the illustration. Later on finishing this step, the left crossbar of your cross should now be complete.
Stride iii — Complete the Left Side of the Cross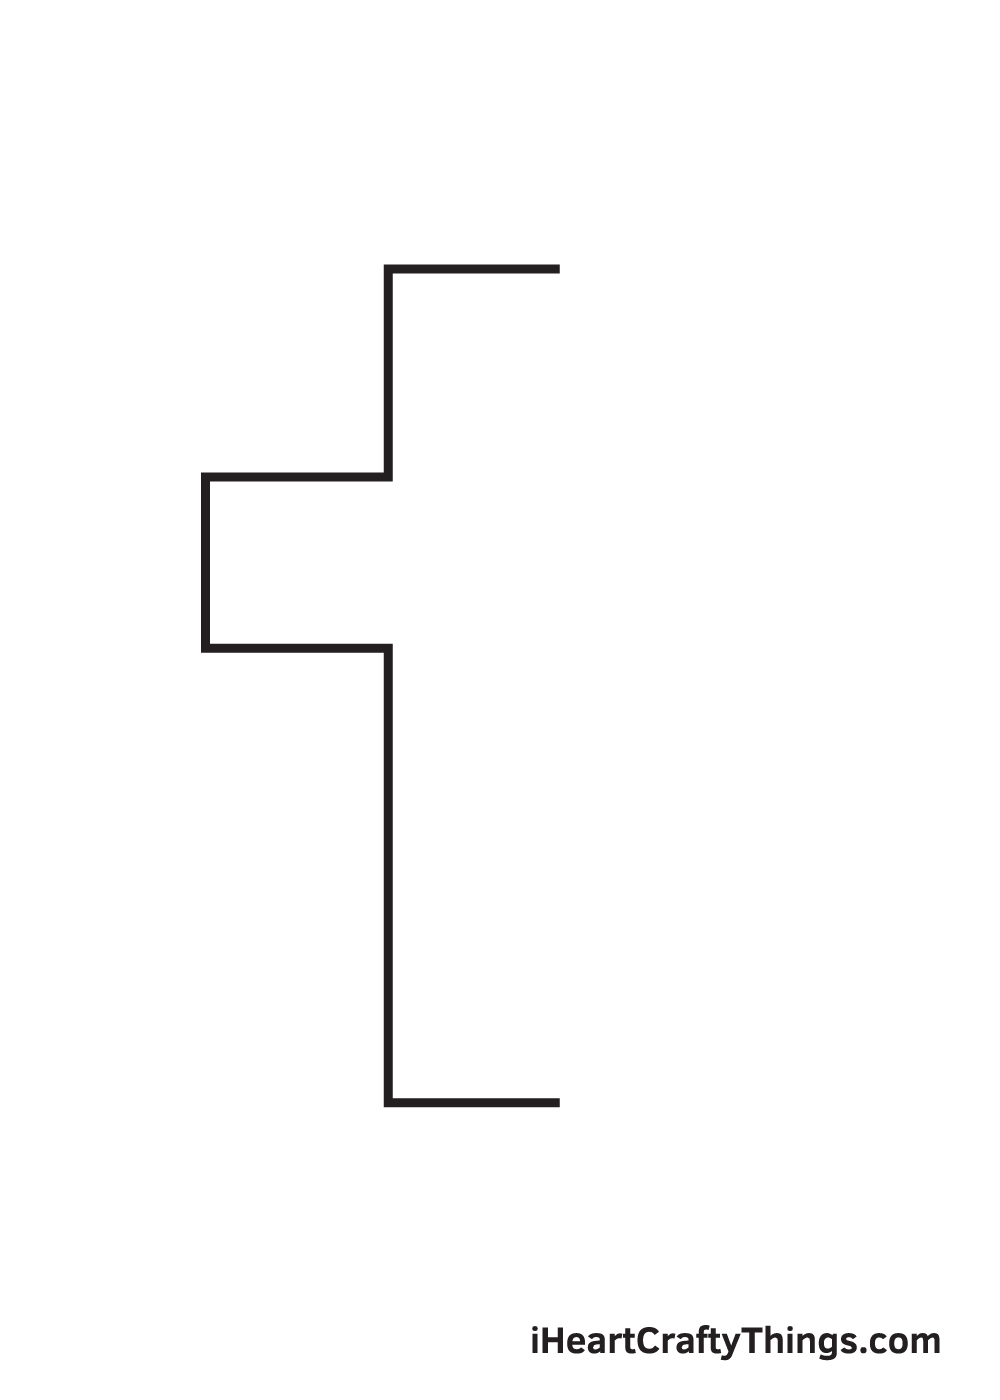
Draw a vertical line starting from the correct end bespeak of the bottom line of the left crossbar. After, draw a horizontal line showtime from the bottom end point of the vertical line we drew just now.
Go along in listen that the lesser trunk of the cross should be relatively longer than its upper torso, thus the line at the bottom should be of greater length.
Step iv — Draw the Lower Correct Function of the Cross
Draw an upwards vertical line emerging from the correct end point of the bottom of the cross. Afterwards drawing the vertical line, the lesser role of the cross should now be complete.
Next, starting from the height finish of the vertical line we simply drew, describe a horizontal line to structure the bottom line of the correct batten.
Pace five — Finish Drawing the Right Crossbar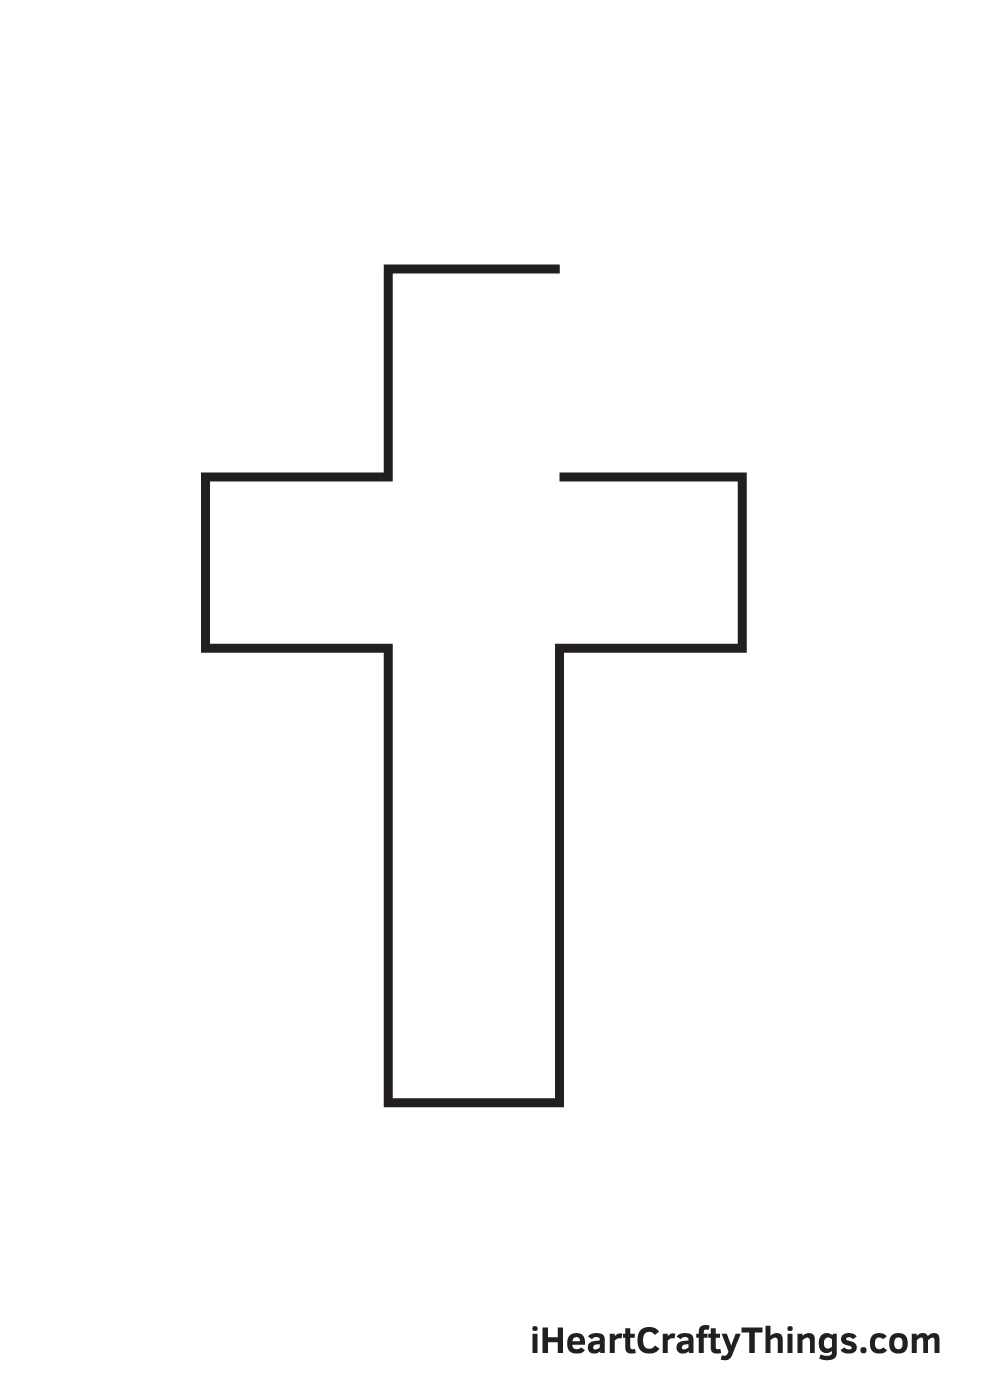
Now information technology'southward fourth dimension to complete the form of the right batten past drawing an upward vertical line beginning from the correct end point of the concluding line we drew in the previous pace.
Then, connect it with a horizontal line going left. At this indicate, the batten on both sides of the cross should now be finalized.
Pace 6 — Finalize the Shape of the Cross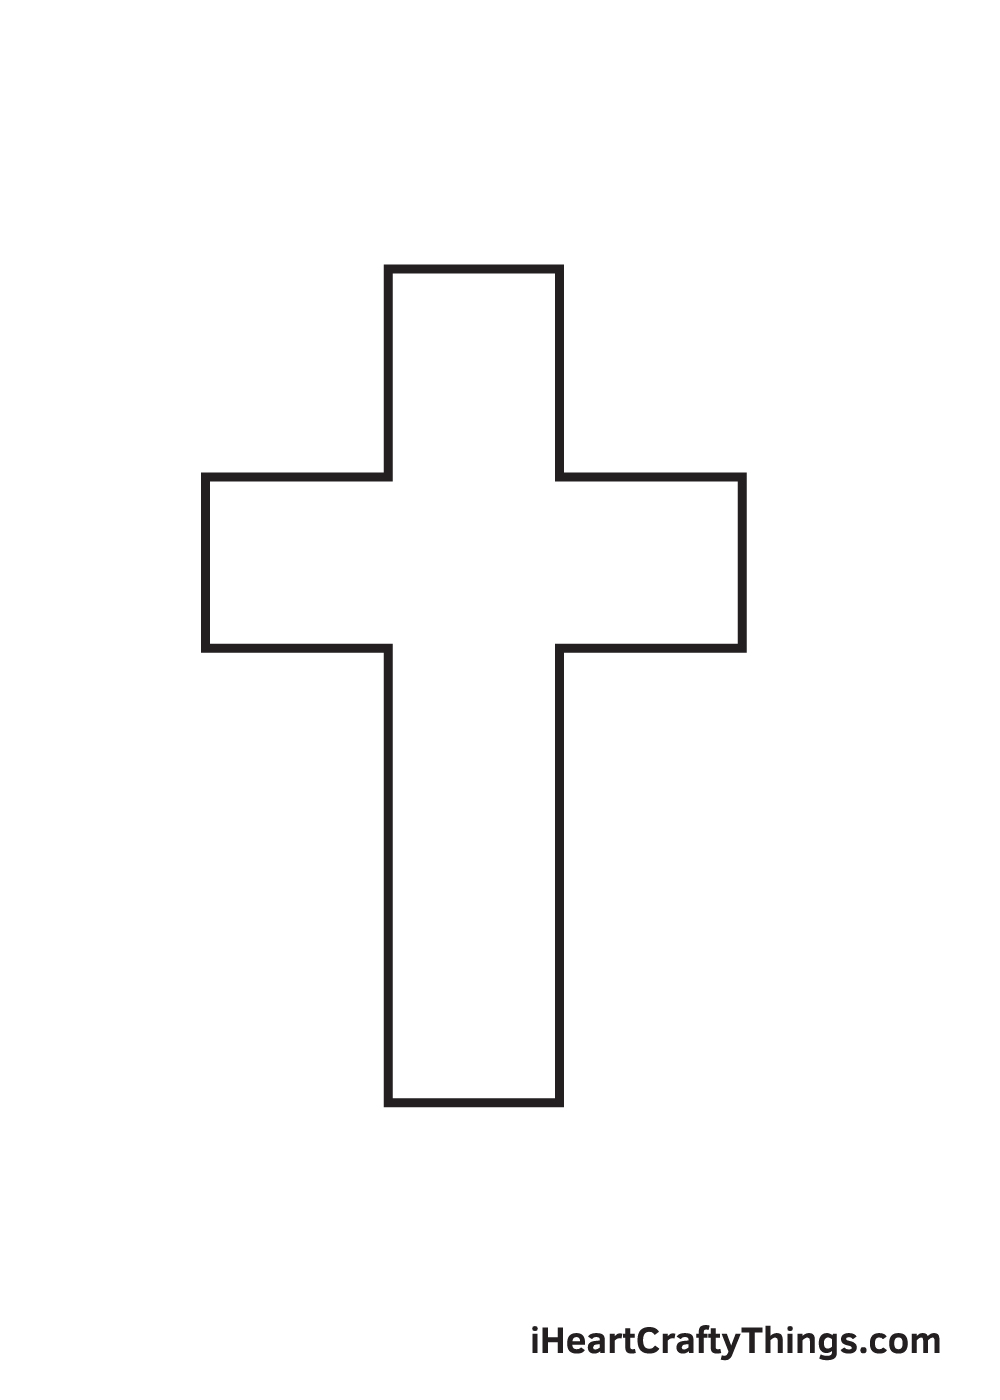
Draw a vertical line on the bare space, connecting both ends of the horizontal line at the peak and the one at the bottom.
Afterward finishing this step, the shape of the cantankerous should at present exist finally consummate.
Step 7 — Add a Width Illusion on the Cross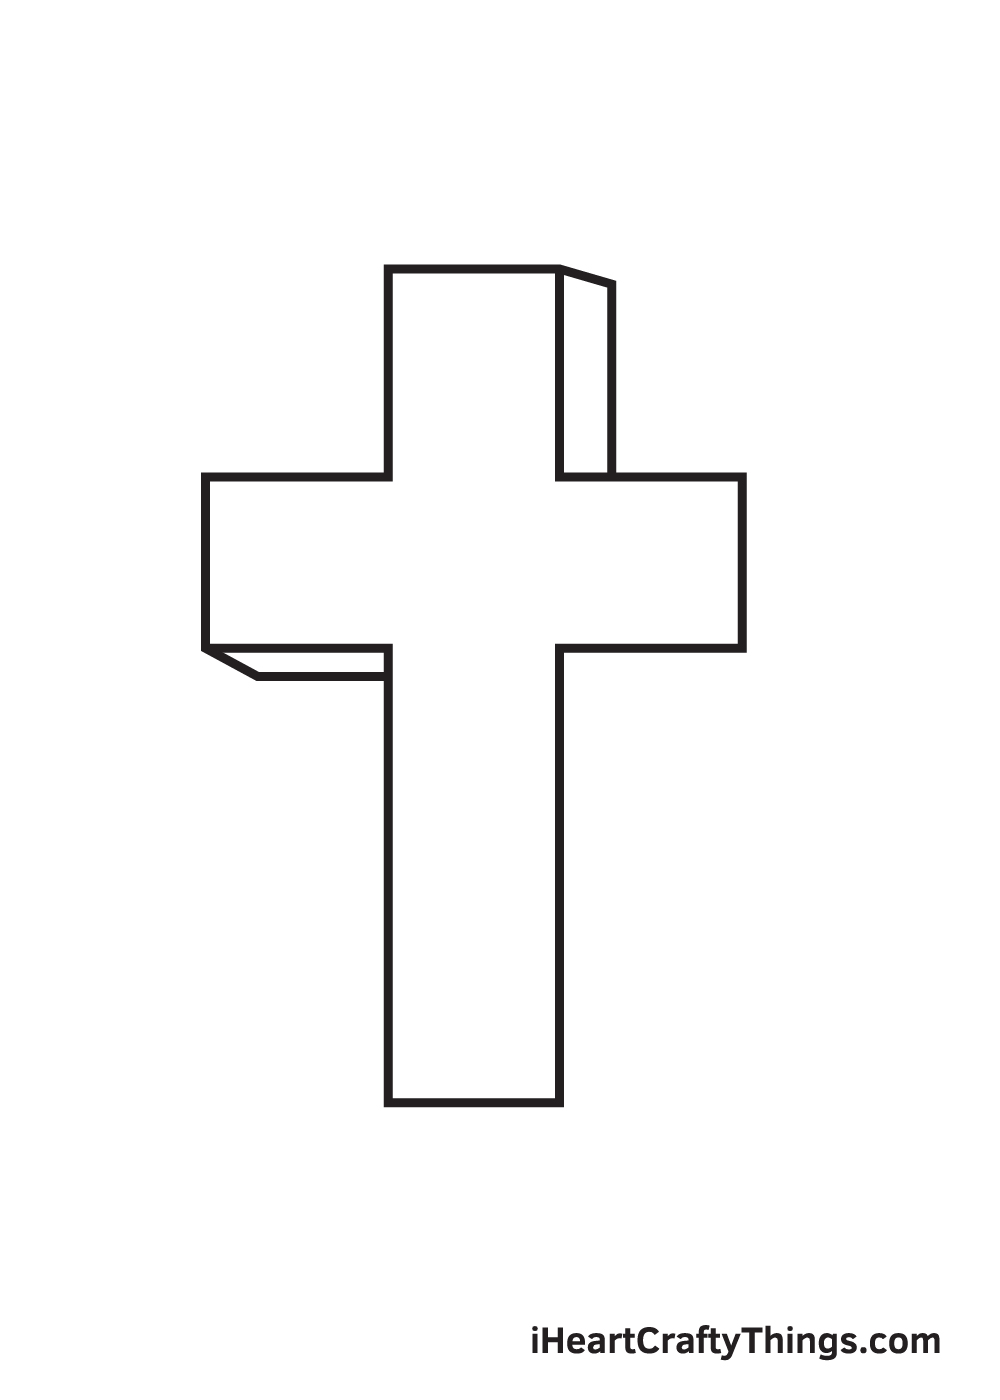
Now that we have successfully drawn the outline of the cross, it's time to depict the dimensions of the cross to make it announced more realistic.
Start by drawing a short slightly diagonal line on the right side of the summit of the cross. Then, draw a vertical line post-obit the outline of the cross.
Now, moving on to the bottom part of the left side of the crossbar, draw a diagonal shape from its corner and draw a horizontal line parallel to the outline of the cross.
Step eight — Create a Iii-Dimensional Effect
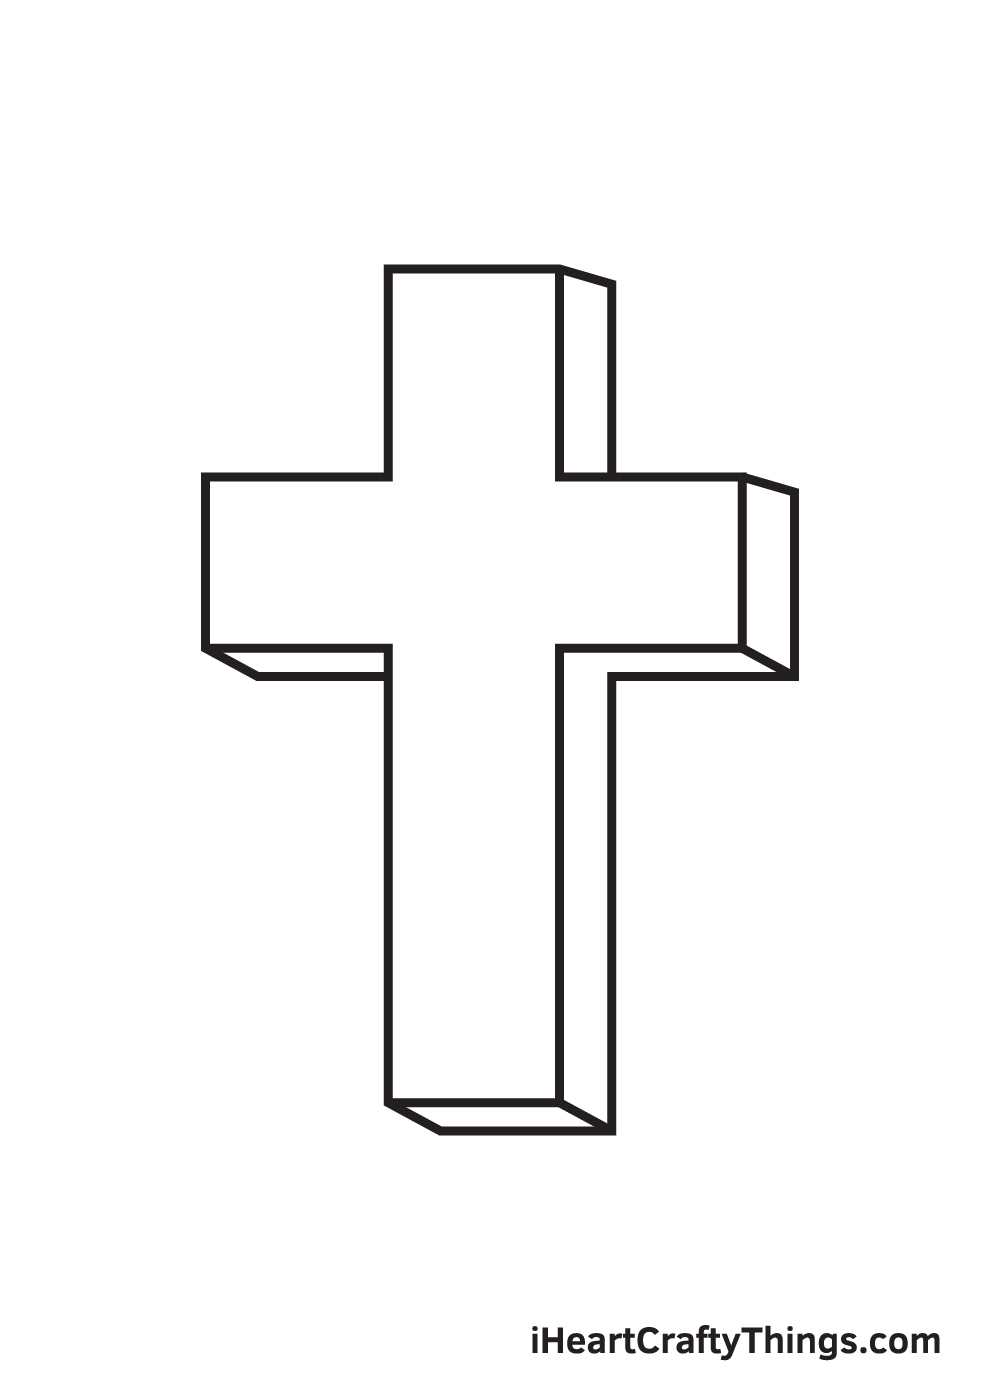
Repeat the previous step on the entire right side of the cross as well equally its lesser part. Don't forget to add diagonal lines on all the corners of the cantankerous to create a realistic 3D effect!
Step 9 — Add Patterns and Texture on the Surface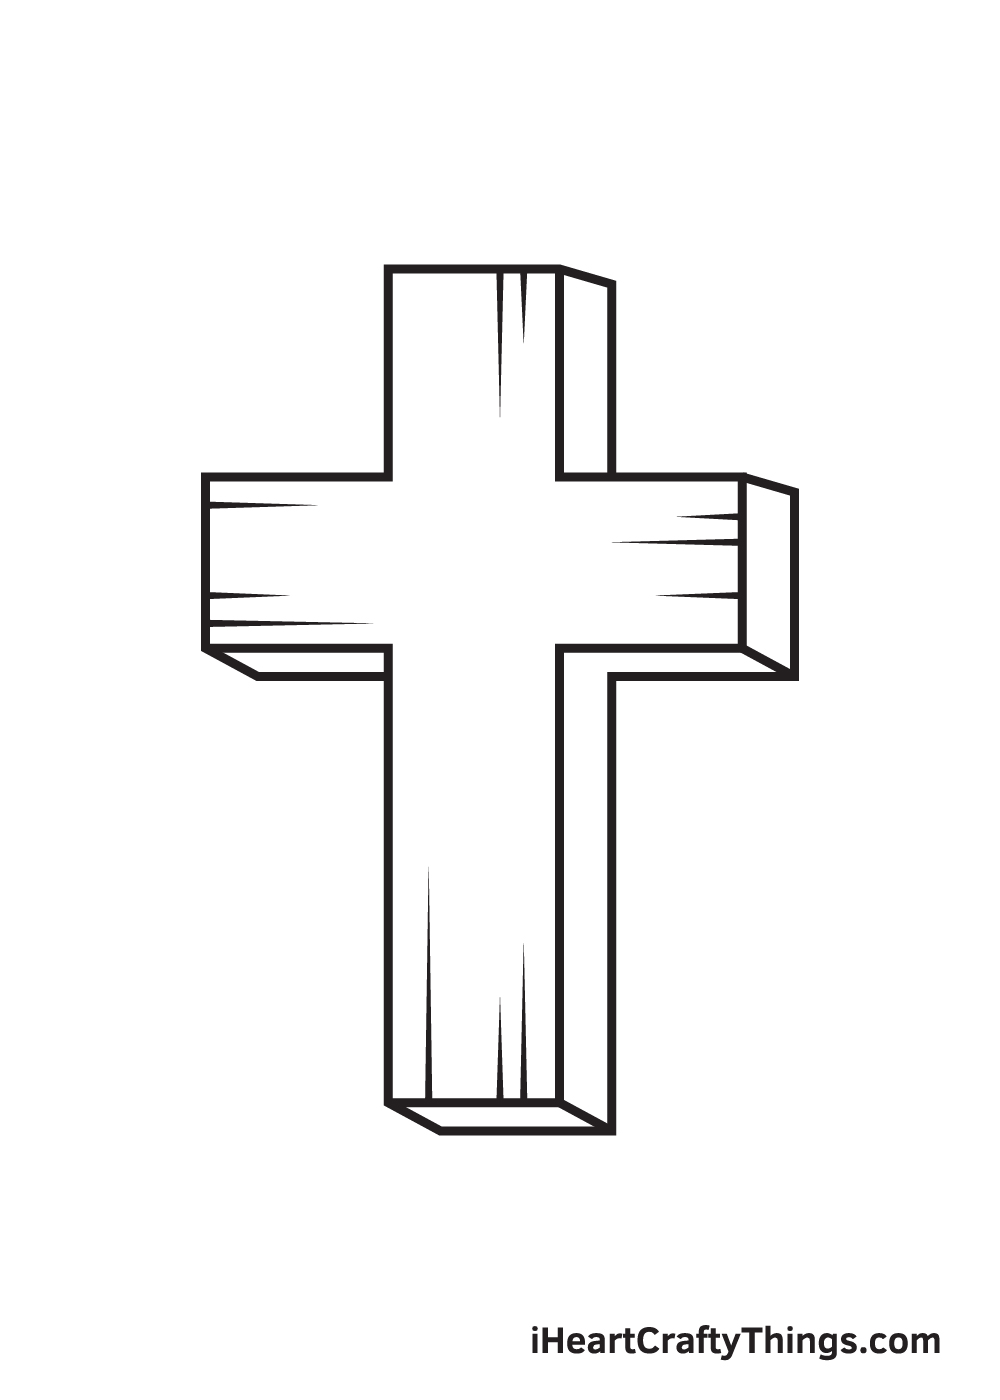
Brand your cross appear more realistic by drawing straight lines in various lengths on all four sides of the cross.
When cartoon the lines, make sure that the part of the line near the border of the cross should be thick, and it should be getting thinner as you go further.
Finally, here is the near exciting and fun part, which is coloring your drawing! This is the part where you lot can showcase your artistic skills and ability to put together different colors.
A cross is traditionally made out of wood, so it is usually brownish in color. However, yous tin can brand the cantankerous whatever color yous desire. Afterward all, it's your work of art! And so, it's all upwards to you!
Bask choosing the colors and lookout man as the cross ultimately comes to life! And while you're at it, why not try experimenting with different coloring materials also?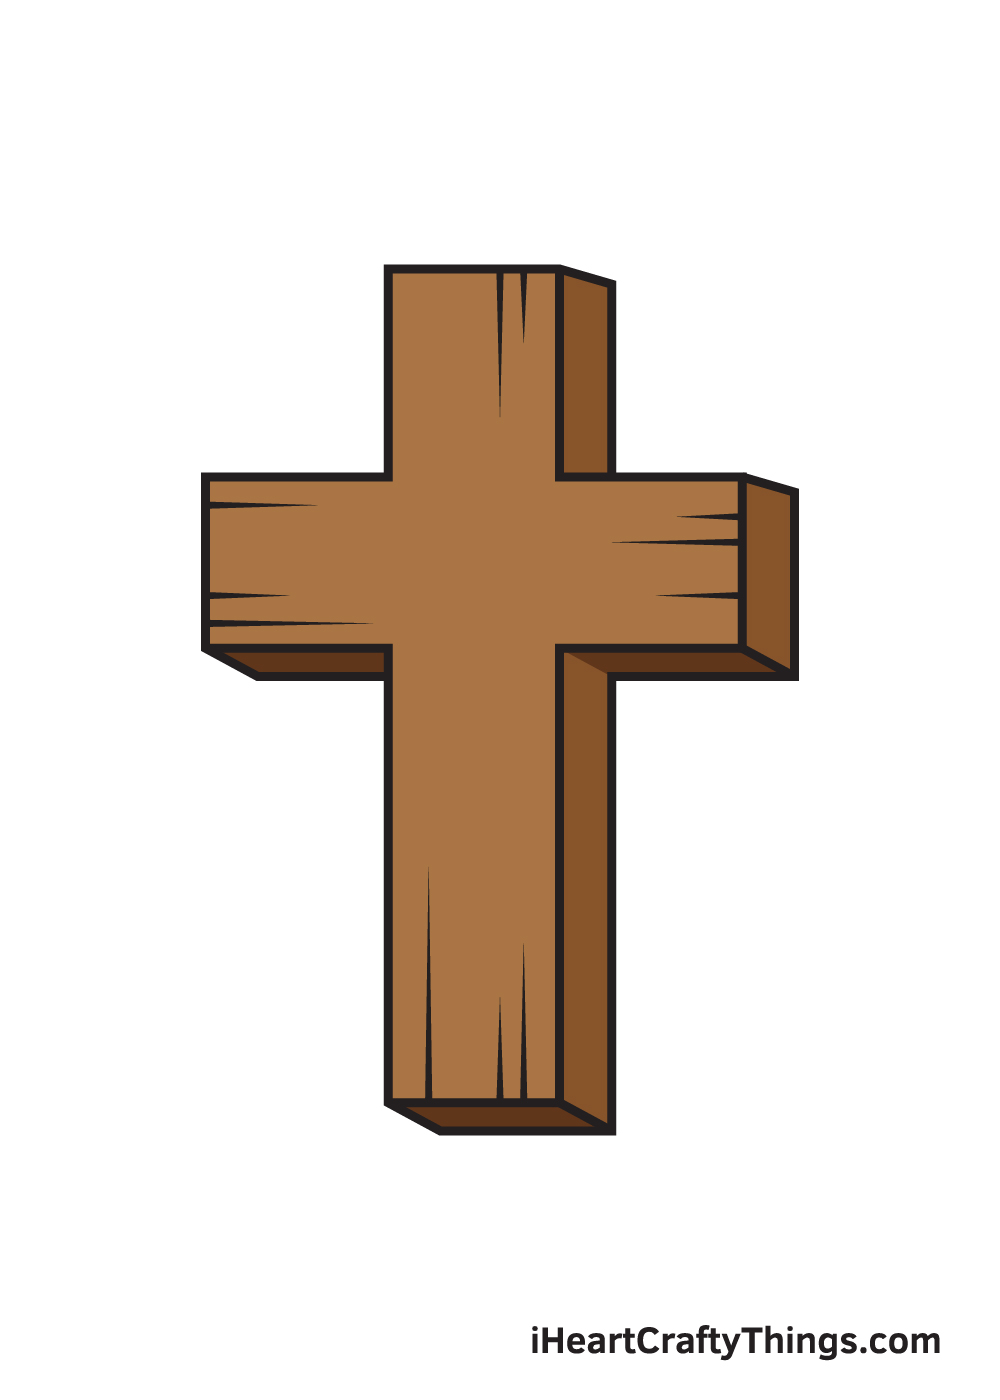
Your Cross Cartoon is Complete!
We promise you lot enjoy this pace-by-step cross drawing tutorial. Whether you're a beginner or an expert in drawing, we're sure you can draw a cross flawlessly with the help of this guide.
If y'all love cartoon geometric shapes, this volition surely exist a fun activity for you lot!
Nosotros are e'er updating our catalog of "how-to-draw" series, so brand sure you keep re-visiting our website to continuously enjoy brand-new cartoon tutorials. Which geometric shape would you like to draw adjacent? Allow us know!
In one case you've successfully drawn a cross and colored it, we're sure you must be feeling proud of yourself—equally you should be!
Flaunt your artwork past sharing it on our social media platforms, including our Facebook page and Pinterest.
We are excited to see your colorful cross drawing!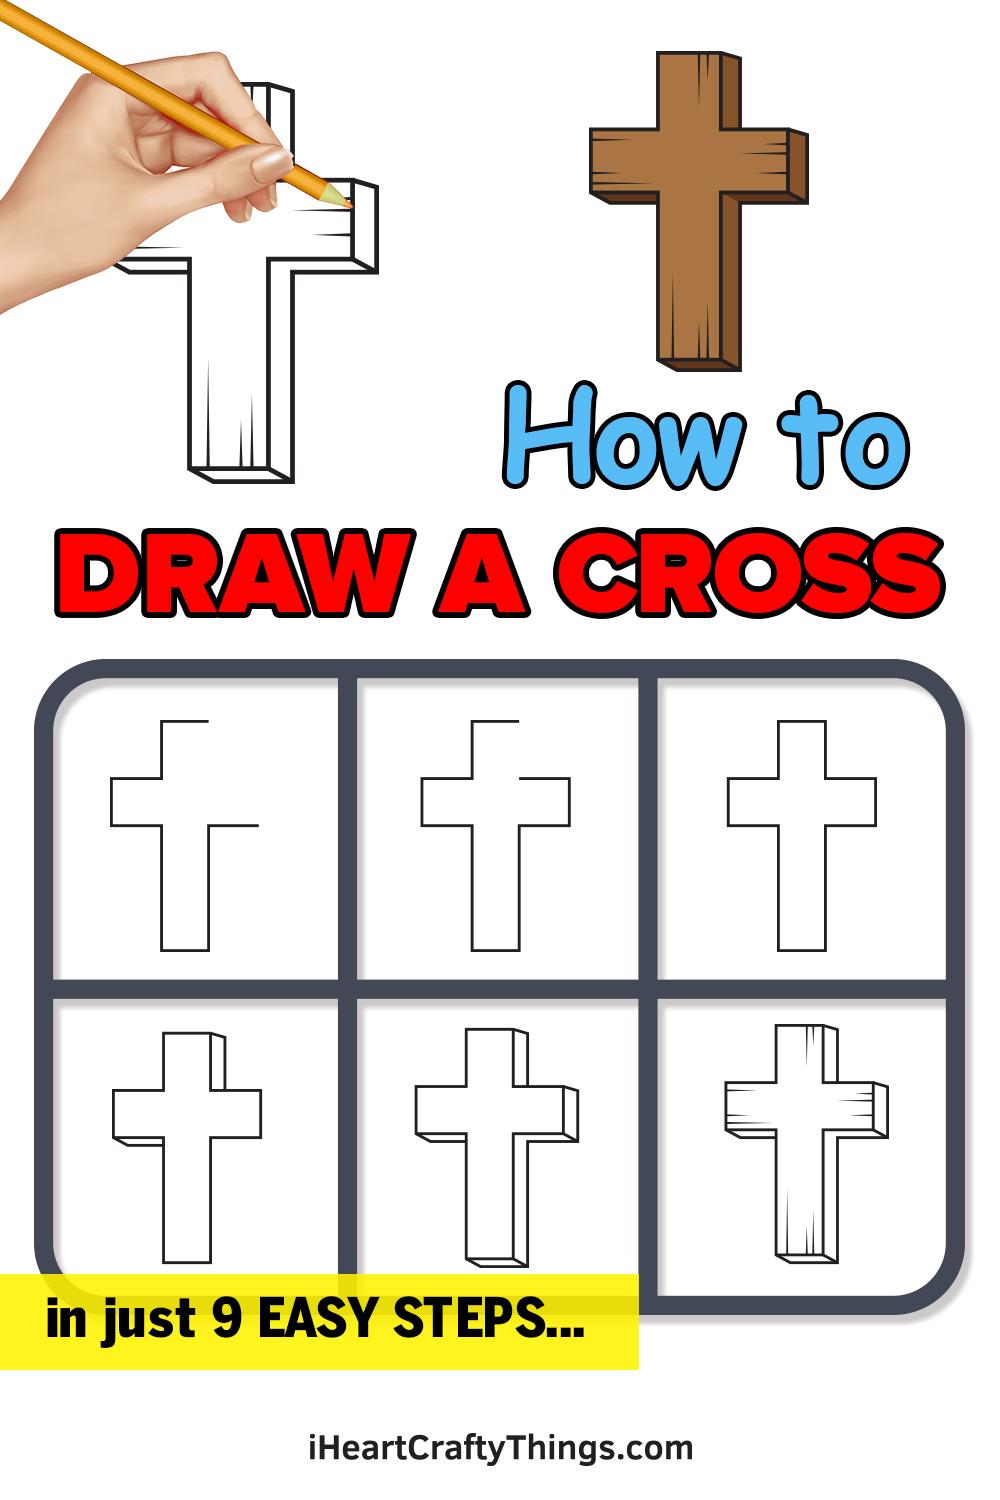

Source: https://iheartcraftythings.com/cross-drawing.html
Posted by: stoneboad1945.blogspot.com
0 Response to "How To Draw A Cross With A Heart"
Post a Comment